
DIY Foraged Holiday Wreath

I think it’s time for a little holiday decorating!
If you’re following along from the “Have Yourself a Merry Little DIY” blog hop - welcome! I hope you enjoyed what all of the talented ladies before me offered! Thanks Carissa from Bless This Nest for sending everyone over here to Adored House!
We have had a decent amount of beautiful sunshine this week in New Jersey, and it made me want to go out and forage for holiday wreath materials. I am so lucky to live in a neighborhood chock full of interesting old growth evergreens, berries, and textural foliage - most of which is right in my own yard! If you have never foraged for wreath greens before, you might be surprised that you have everything you need right in your own yard. A lot of common nursery shrubs and bushes make perfect wreath materials.
How to make a DIY Foraged Holiday Wreath:
MATERIALS:
Assortment of evergreen clippings, twigs, pinecones, dried flowers, berries, etc
Grapevine wreath (available at any craft store)
Floral Wire
Ribbon
TOOLS:
Floral Clippers
Scissors
STEP 1: Collect a good assortment of evergreen clippings. You need less than you probably think, but it’s always nice to have extra to play around with.
STEP 2: I prefer a skinnier wreath base, so I cut off the thick binding grapevine of a craft store grapevine wreath and I divide one grapevine wreath into 2 or 3 separate wreaths. The divided wreaths may need to be bound a little once they are separated - just use a little bit of floral wire to bind them.

Here I removed the thick, binding grapevine by clipping it in one spot and gently unravelling it.

Notice how I divided my single store-bought wreath into 2 skinnier, more whimsical wreath forms.
STEP 3: Start making little bundles of greens and tightly wrapping the ends of them with floral wire.

STEP 4: Working outwards to inwards (or top to bottom - depending on the style you’re going for) attach the bundles to the grapevine wreath with floral wire.

STEP 5: On the opposite side of the wreath attach the same style of greenery to create a symmetrical look (if that’s what you’re going for). Continue working side to side, overlapping the bundles until the desired amount of wreath is full.

Notice the wire binding the grapevine wreath together…I strategically made that the bottom of my wreath because I knew the wire would be covered by greens.

I layered my greens so that the wispy ones were attached first and the stiffer varieties were layered on top. This is mostly personal preference, but it also helps prevent the greens from flopping forward when the wreath is upright.
STEP 6: Add berries and other adornments (pinecones, pods, twigs, etc.) last by wiring them into wreath.
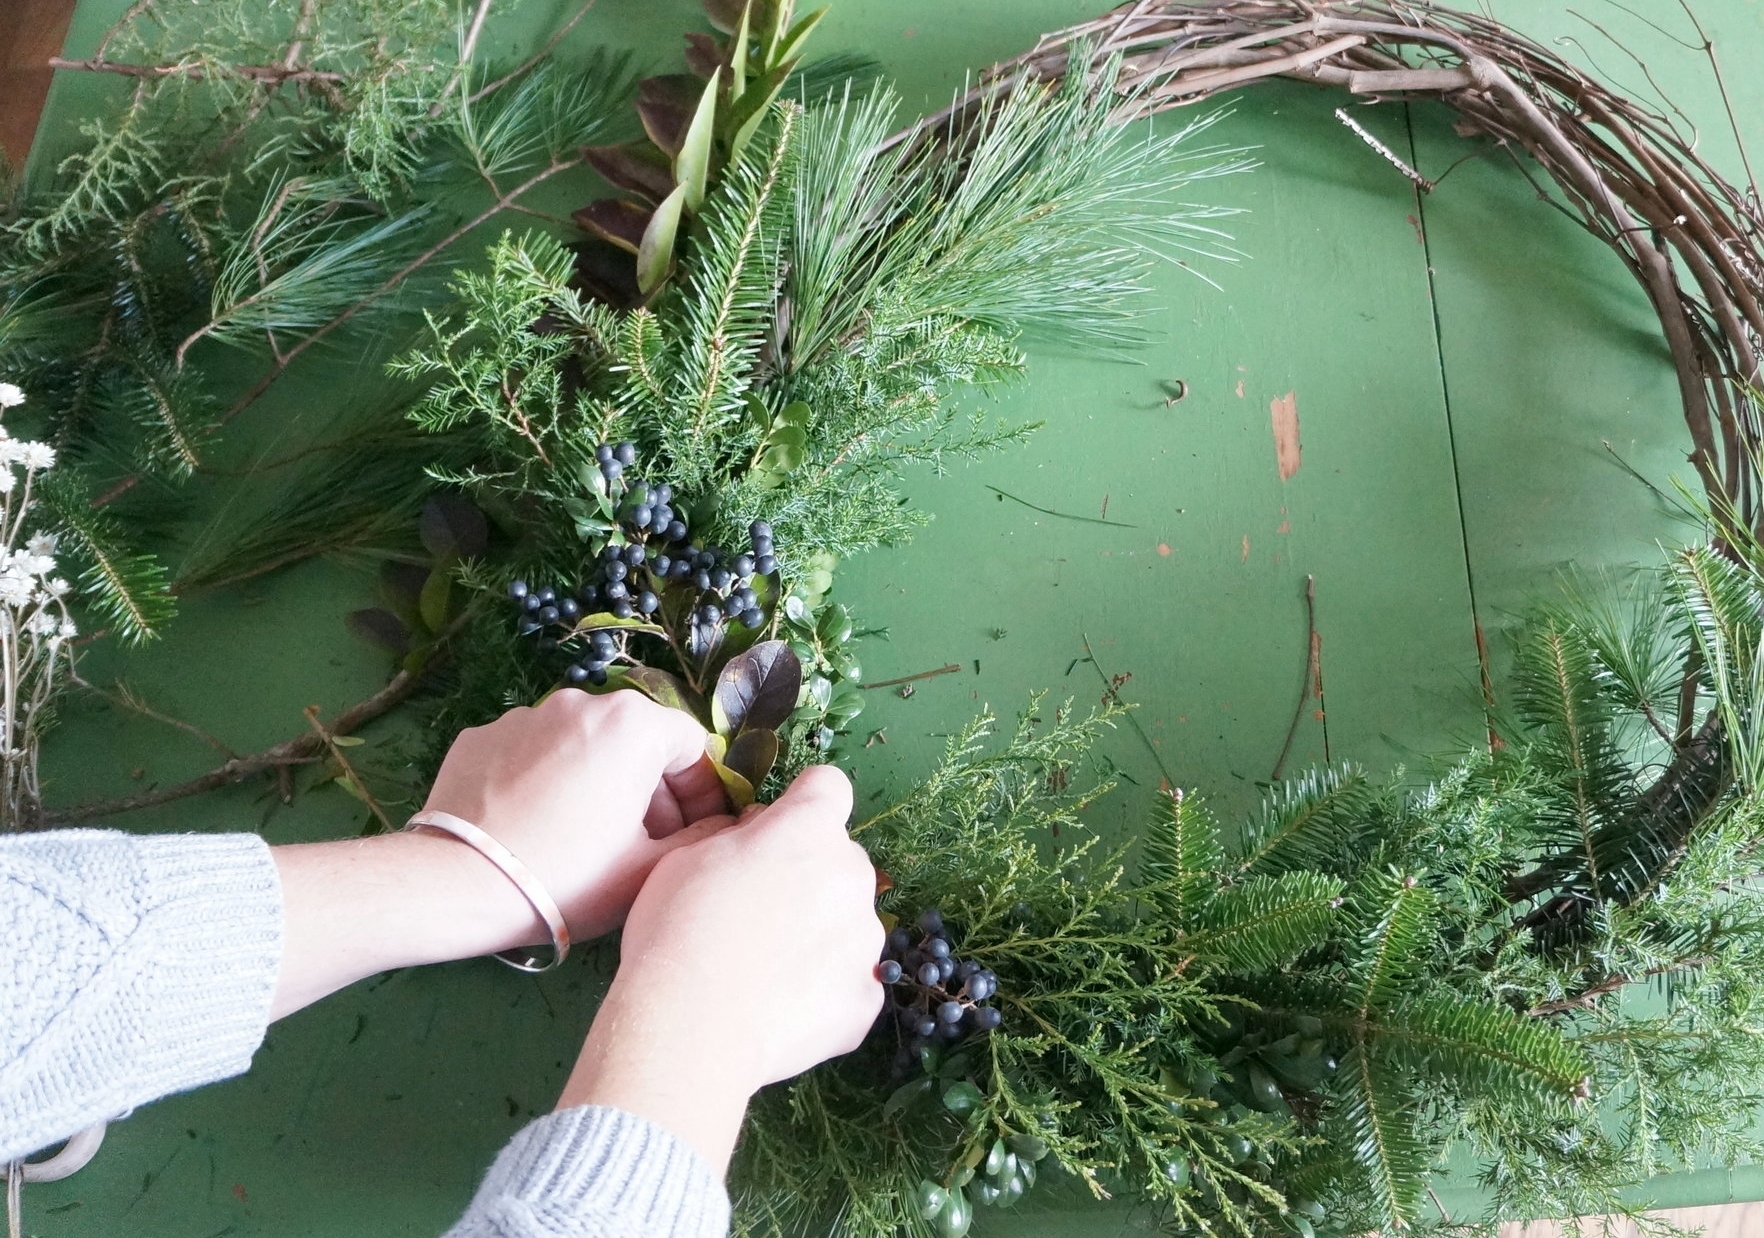
STEP 7: Add more delicate adornments like dried flowers to the wreath by wrapping the bottoms of them with wire and threading it into the wreath.


STEP 8: Put a bow on it! I used raw-edged silk ribbon for my bow, but any ribbon will do. Cut a length, find the middle, and twist a 1ft length of wire at the mid-point. Use the wire like a needle and thread it through the wreath, securing it at the back of the wreath. Tie the bow to your liking (I like loose, floppy bows).

The finished product!

What do you think? Are you going to give it a try? If you do I would love to see what you create, so send me a picture or tag me in a picture on Instagram!
Ready for more Holiday DIY goodness?? Head over to Lindsay’s blog, Aratari at Home to see her DIY project!

Wednesday

Aratari At Home // The Tattered Pew // My 100 Year Old Home

Crisp Collective // Bless This Nest // Adored House
Thursday

Seeking Lavender Lane // The Honeycomb Home // Joy In Our Home

She Gave It A Go // Grace In My Space // Little Nest of Four
Want to save this idea for later? Pin this image:
